Steps for Registration to the Apcela Helpdesk Portal:
1. New users can request an access to our Apcela Helpdesk Portal by the following these steps:
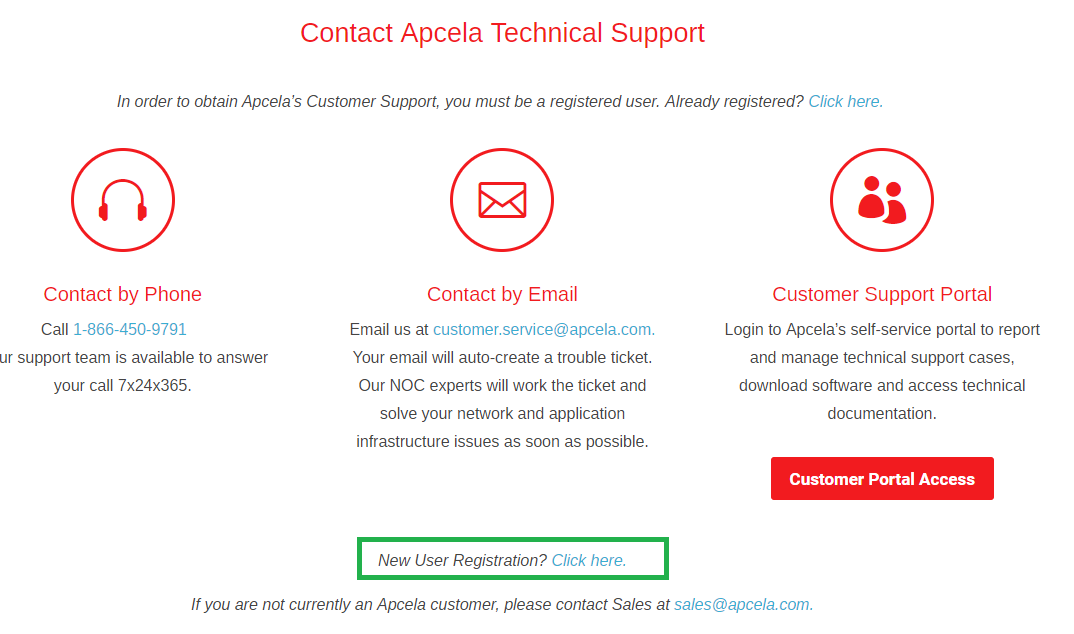
a. Going to our Support page at https://www.apcela.com/support
b. Clicking ‘New User Registration? Click here‘ link as shown below.
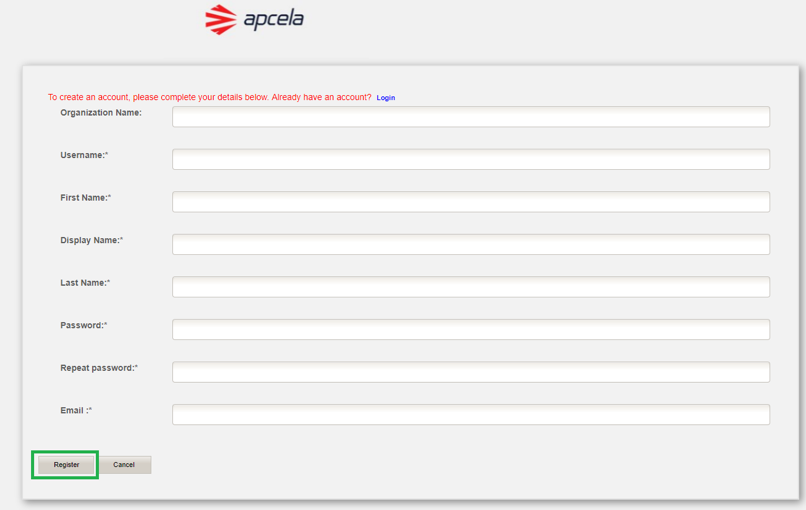
c. Filling out the form and clicking the ‘Register‘ button.
NOTE: Once the form is submitted, you will receive a confirmation email, and your request will be processed within 24 hours.
2. Apcela will work with customer’s primary point of contact to identify list of authorized registrants (users) to the Apcela portal.
3. Apcela then establishes an account and temporary password for authorized users. Once the user account is established, Apcela will email each user individually with account registration instructions including a temporary password.
4. In order to perform the registration, each authorized user will need to download a One-Time Password application (“OTP”) to the user’s mobile device. Below are example applications that you can download for free in Play Store or App Store.
Common Applications: Google Authenticator, Microsoft Authenticator, OTP Authenticator
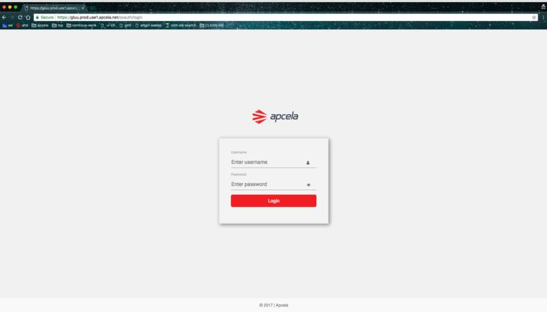
5. Once you have completed the download of the OTP application, go to https://jira.apcela.net/ where you will perform your initial login with the temporary password provided and your OTP for dual factor authentication as prompted. As per screen shot below, user will enter username followed by initial password.
6. Once you have entered username and password, you will then see a QR code (see below picture). When you see the QR code, please open your OTP application on your mobile phone and you’ll be prompted to create a new account. You will now point your mobile device to the QR code on your computer screen which will set up your account.
NOTE: there is a timer on completing this step. You will see a progress bar just above the “Finish” button as in image below and you will want to complete the QR code scan before the time expires.
If time runs out, you will get an error message. You will then need to back to https://jira.apcela.net and repeat the process from there. Click “Finish” after your Account is showing on your mobile device.

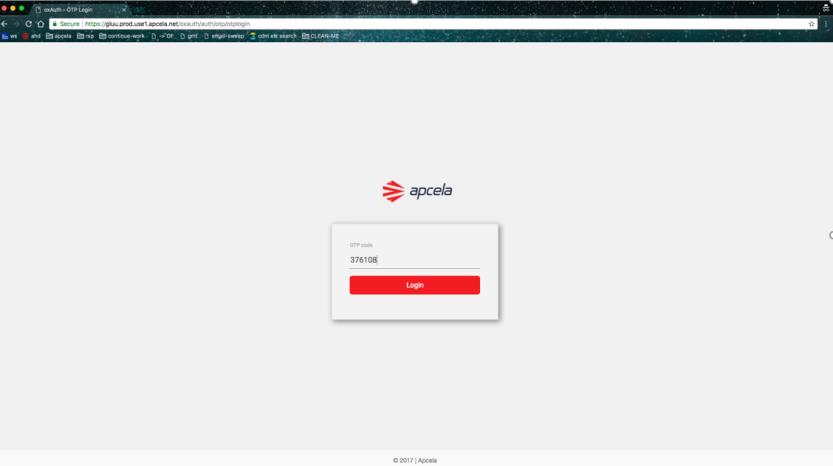
7. The image below shows the JIRAOTP Code prompt screen. You will see this screen prompt every time you login once registered. Use the OTP pin on your mobile device.
NOTE: OTP pin numbers refresh every 20 to 30 seconds so be sure you type the OTP pin before it refreshes and if the timer is close to expiring, you should wait for refresh.
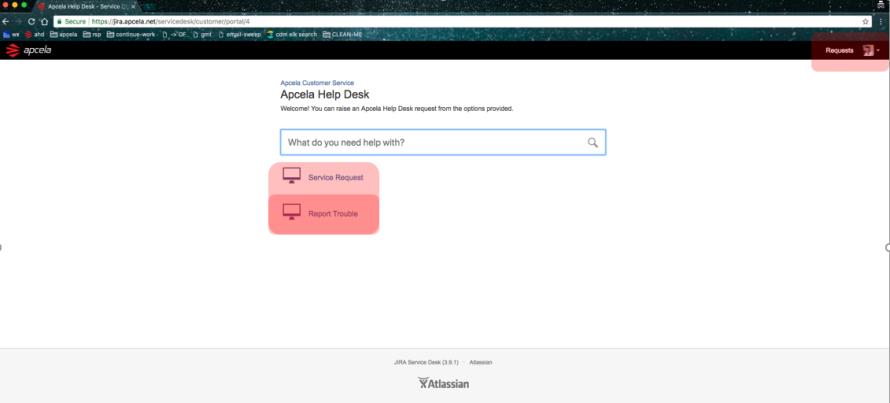
8. The next screen you will see is the Apcela Help Desk Portal as per the image below. From this screen you can click on Service Request to open a new Service Request. You can also click on Report Trouble to open a trouble ticket; however, before you start using the portal, you need to change your password.
9. You can customize your password by going to this link – https://gluu.prod.use1.apcela.net/. Use the same credentials as your initial login to https://jira.apcela.net.
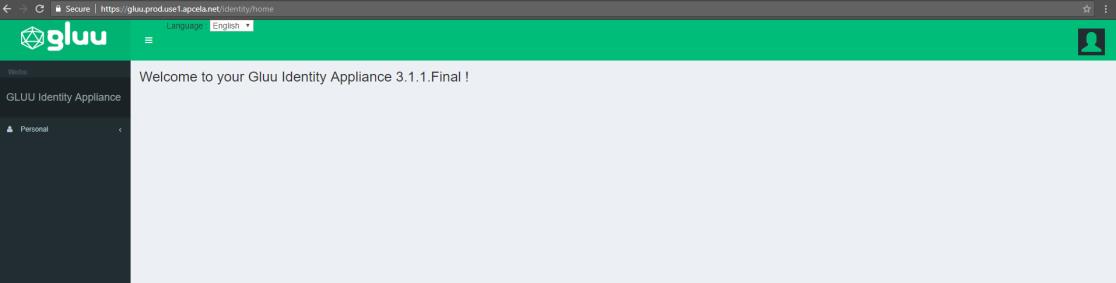
10. On the left part of the page, go to Personal->Profile. Click the Change Password button and type your preferred password. Click Set password button to submit your New Password.

Congratulations! This completes your registration process to the Apcela Help Desk Portal. You can now go back to https://jira.apcela.net/ to create, view and check the status of your tickets.